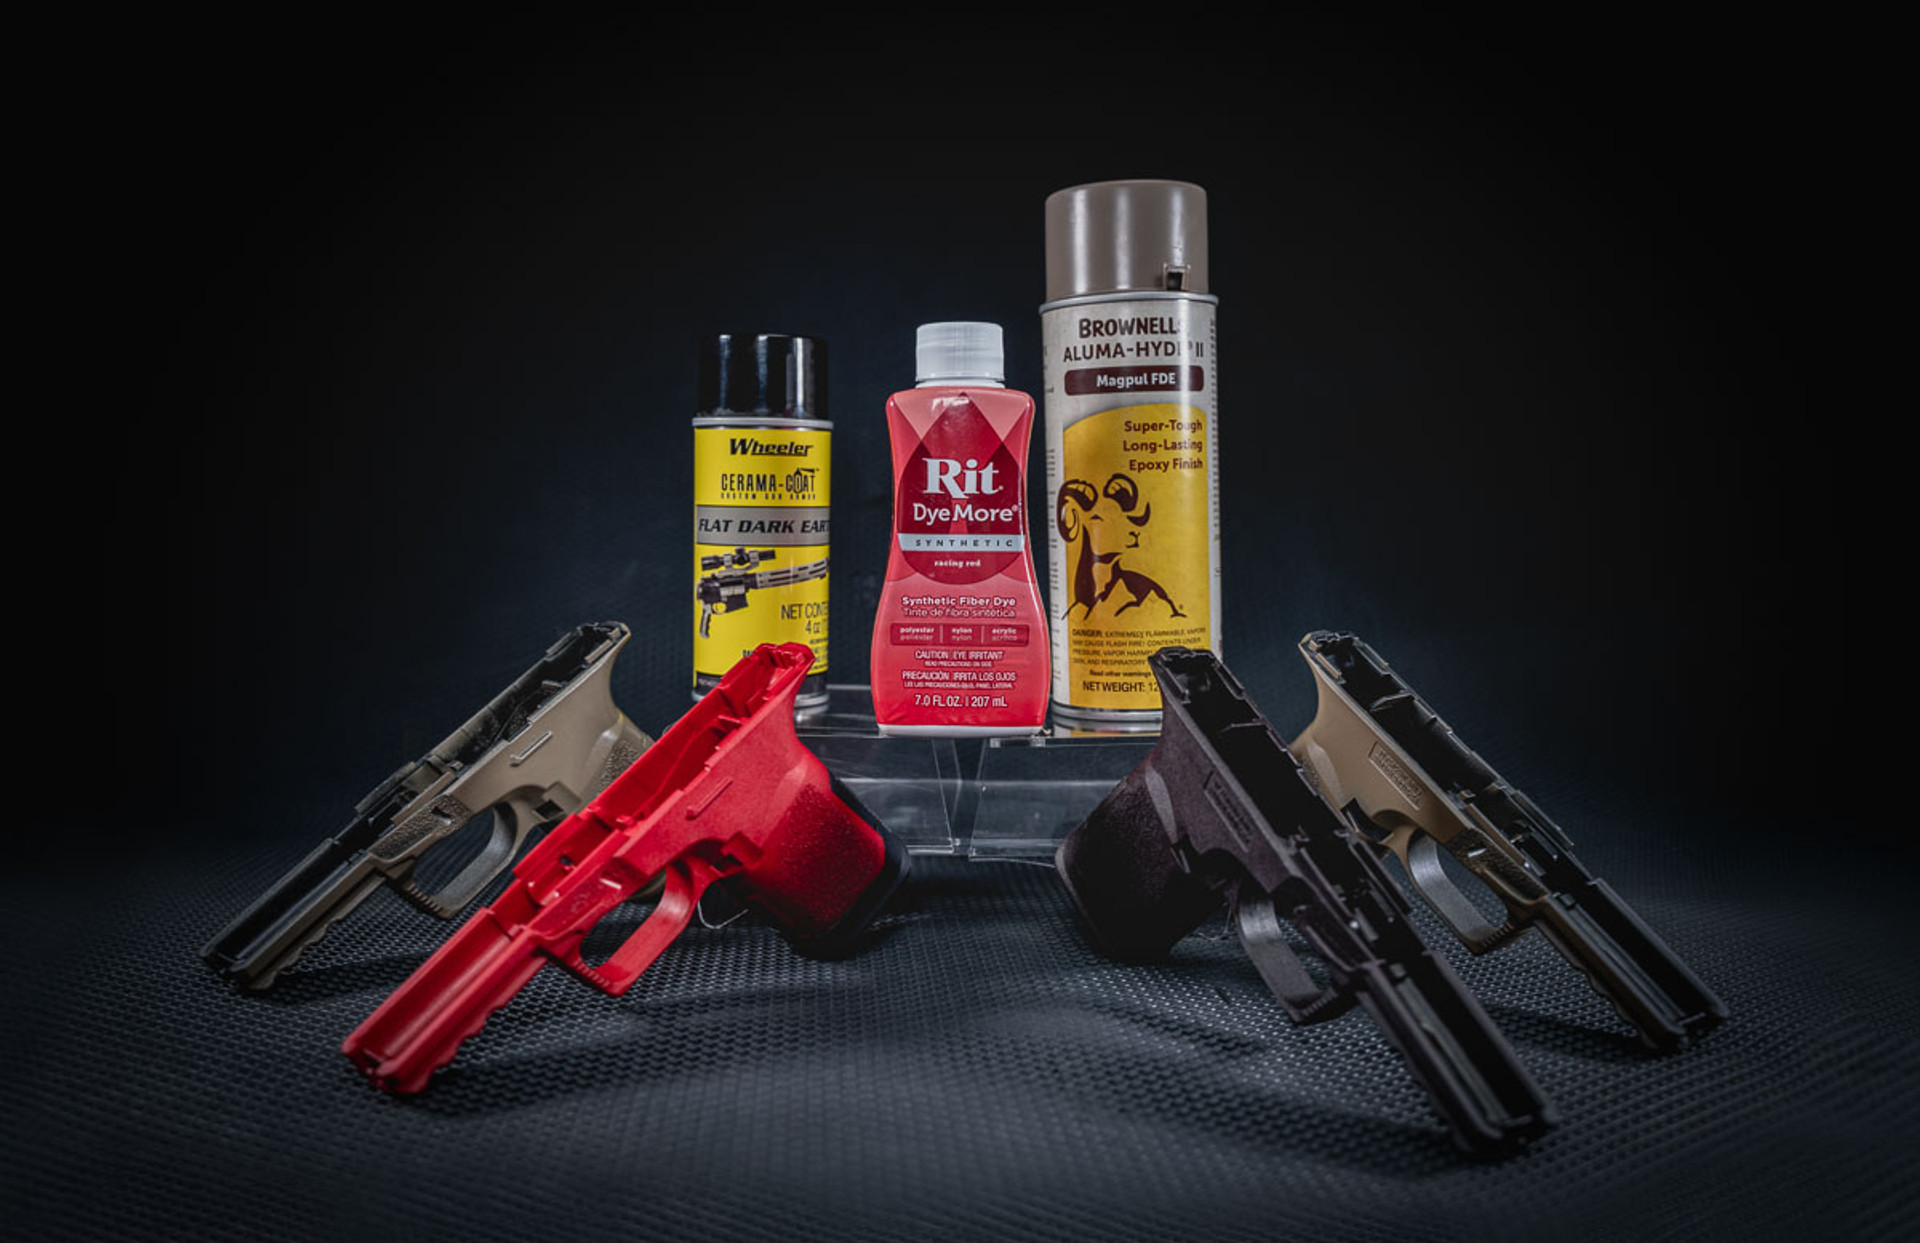
How to paint your pistol frame — (Part 1)
We’ve received some questions about the best way to paint a polymer pistol frame so we decided to give it a go ourselves to see what we can do. Actually, we’ve painted quite a few guns and gun parts in the past so this was a fun experiment to see what materials and methods would work the best.
Disclaimer: Below you’ll find a few different methods we used and while we had some pleasant results we can’t guarantee that this will work as external factors such as the weather or the ambient conditions of your workspace can also affect the results of your DIY project.
DIY Painting Methods
So you want to paint your pistol a new color on a budget and you don’t want to go through an expensive custom shop that involves shipping, FFL’s and a few pretty pennies. Good news is that whether it’s an 80% frame or not, the method is going to be the same. If you’re working with a 100% handgun, you’ll want to make sure that you take all your internal parts out, including the magazine release button so that there are no metal or critical elements from the lower parts kit that would have their tolerances ruined by being exposed to any paint.
Take a paper towel with some rubbing alcohol to thoroughly clean and prep your polymer frame before applying any sort of paint coating onto it. For our test frames, we’ve taken some brand new, unbuilt, 80% GST-9 MOD1 frames to see how they do!
Spray Paint
For normal spray paint, our go-to choice is Rust-Oleum Camouflage spray paint cans, which you can buy from Amazon.com and most hardware stores This specific type of paint from the Rust-oleum brand includes five colors; khaki, deep forest green, army green, earth brown and black. Together, these colors can produce a pretty good variety of camo patterns such as M81, or ‘woodland.’
Instructions (Steps we took)
- Set up your work space. I put up some cardboard boxes to rest the frame on and to block the wind since this was done outdoors.
- Apply three coats of paint. In between each coat wait about 30 minutes or at least for the most recent coat to not look obviously wet. Avoid overspraying to the point paint is dripping off of the frame.
- Once your final coat has dried enough, get ready to toss it into the oven.
- We set the preheat and set the oven to 200 degrees Fahrenheit and put the frame and a grip module in for 20 minutes at first just to see what would happen.
- Everything seemed to be fine and while hot, our GST-9 frame showed no signs of warping so we continued on to let it sit for an additional 40 minutes.
- At the end of the hour in the oven we took the parts out to cool down. And even after that the paint actually felt a bit sticky but we were short on time and had to experiment with other frames so we simply let it sit in a shaded and cool environment to air dry for a week after that.
What did we learn?
Well, we probably should have asked our engineering department before doing this experiment.
Something important to be aware of is that our frame’s melting point is 503 degrees Fahrenheit and the temperature where the frames begin to become soft and moldable is at 167F. Where is the problem here? We set the oven temp to 200F!
How easy was it?
While we were pretty satisfied with our results, if we were to actually build these 80% pistol frames out we’d likely be unhappy with the frame having been warped. You can typically identify this by either seeing frame droop or the mag well becoming too tight for magazines to properly go in and out of it. Spray paint is thin enough that it doesn’t gunk up on your frame but even when applied well, it inevitably will wear off, and without much effort too. So if you like that battle worn look, spray paint can definitely help provide that. However, you might not be able to accurately predict where the paint ends up wearing off. If you cleaned and prepped the surface of your frame, you’ll have a higher chance of the applied paint to not chip off.
What would we do differently?
To have the best results without worrying about damaging the pistol frame, we’d still spray on 3 layers. Instead of 200F, we’d set the oven to 150F and let the frame or any other painted parts bake for about 30 minutes only. After a few days to a week of air drying, the results should be quite good. This way there’s little to no chance of the frame warping.
Cerakote Spray Paint

The steps we took for our Cerakote spray were exactly the same as when we spray painted our pistol frame above. So the main issue and solution remain the same. The cerakote spray from Wheeler was impressive. You can visibly see and feel the difference compared to a regular Rust-Oleum spray paint. The cerakote was a bit thicker and felt more substantial. Honestly, on some parts of the frame, at a glance, it was hard to tell if you weren’t holding it whether the frame was painted or actually the FDE GST-9 frame we sell in that color already.
Aluma-Hyde

We’ve heard of Brownells Aluma-Hyde II a number of times over the past few years but rarely seen it actually used in person so trying this out was very interesting. The frame that had the Aluma-Hyde coatings was certainly the toughest and most resistant to scratches or drops on the ground but it was also the ugliest. This coating is so thick it’s not very aesthetically pleasing or comfortable to hold. If you are painting your frame that already had holes drilled out you need to cover those up with paper towels or tape in order to not ruin those tolerances.
From what we’ve seen, this paint is extremely glossy and reflective on AR lower receivers and aluminum parts so it’s not our second or third choice when it comes to spray paints to say the least.
Rit Dye Test 1
Rit Dye was something we learned about on Reddit which led to us a whole slew of random YouTube videos that showed people using this cheap dye liquid to actually change the color of their polymer pistol frames. The methods vary but generally speaking they’re all pretty similar. Here’s what we did:
- (Ideally, use a stainless steel pot.) We didn't have one on hand, so we turned one of our personal ones into a sacrificial pot.
- Once water is boiling add 1 full bottle of Rit Dye.
- Carefully dip the frame in and out of water until you get the desired shade of color. Do not leave the
frame in the pot for too long(no more than 3 seconds) and be sure to let the frame cool off out of the pot
a little between each dip. - Once desired color is achieved, drop the frame (in our case it was a white GST-9 frame) in a bucket of warm water for it to cool down slowly in.
- Dry off with paper towels and marvel at your work.
Rit Dye by far was our favorite method because it didn’t involve putting on any new coatings of paint and it was the fastest way to change the color of your frame.
Rit Dye Test 2

We were so pleased with the red MOD1 frame that we wanted to try again. So, we retried all the steps above, except this time we used a black GST-9 frame. Black frames tend to not take color as well so the only difference in this experiment was that we used two full bottles of Rit Dye. Color just wouldn’t take so we boiled it for longer and the end result actually turned the frame into a deep plum. It’s quite nice but not very visible as the color is pretty muted.
The only concern is whether this frame would really be usable if built out since it was in hot water for a longer period of time (which we haven’t tried yet).
Main Takeaways:
- Amount of rit dye you use matters and can affect the shade of color you end up with.
- The rit dye you use also must be proportional to the amount of water you have in the pot so keep that in mind.
- Do not boil the frame for too long to avoid warping your frame.
- Black frames do not take to Rit Dye/ or at all.
- FDE and our White color GST-9 frames take to Rit Dye color the best.
Start on Your own DIY Pistol Build Today!
Are you itching to build your own Glock style pistol today? We’ve got everything you need to get that done from the frame to the slide and even red dot sights. If we don’t have an 80% pistol frame in the color that you want, we've shown the steps definitely shown that there are a lot of ways that you can remedy that.


 Back to List