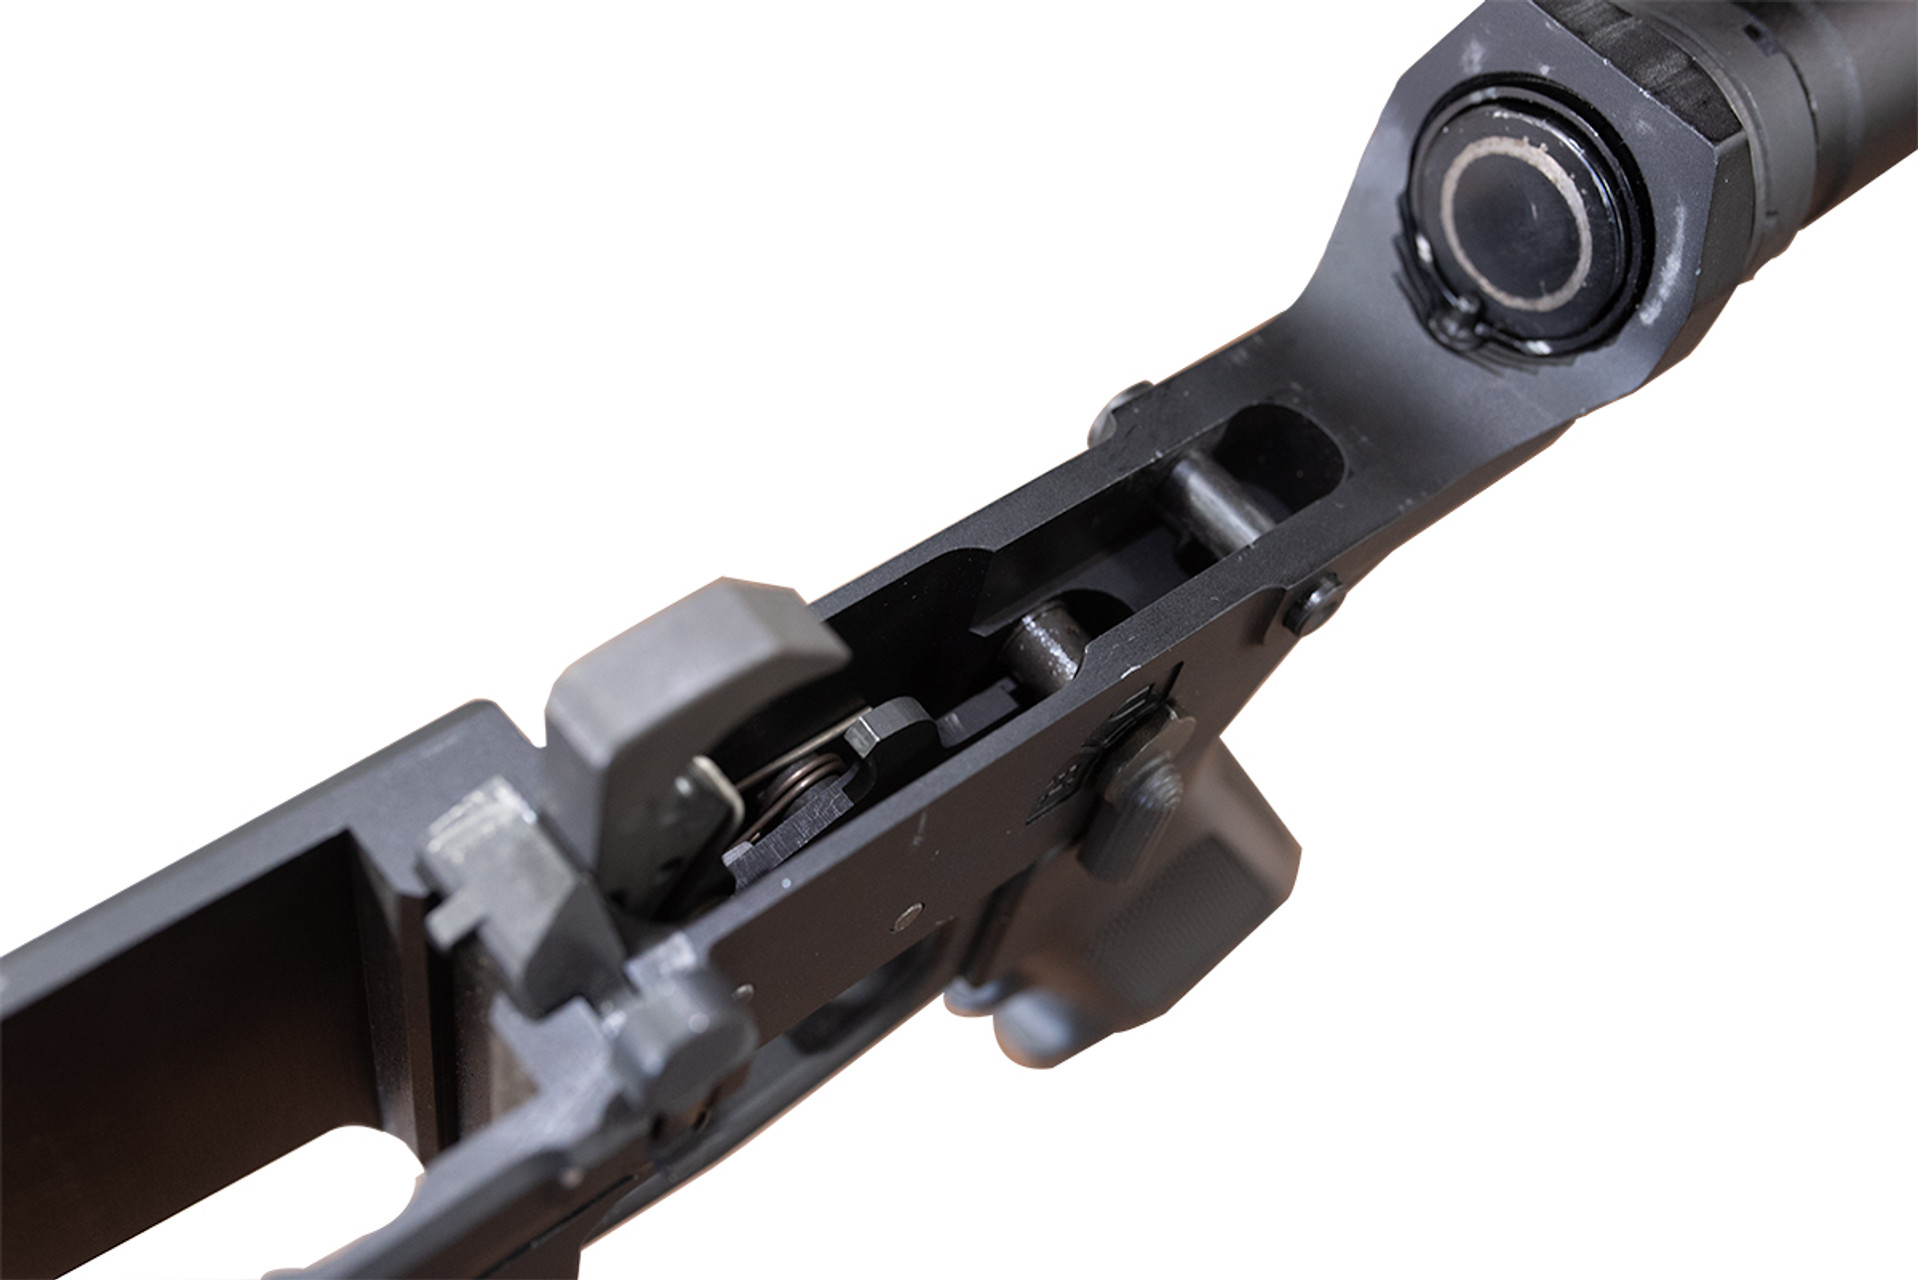
How to Install AR-15 Trigger Group
Did your AR-15 come with a tough trigger? It’s understandable as to why people want to quickly swap out the trigger in their AR15 rifle for a new one when it’s brand new. The trigger hasn’t been broken in yet, might have too much or too little lube and with ammo prices being what they are… it’s actually cheaper to get a drop-in that feels great from the get-go.
Trigger Terminology
As you shop for a new AR-15 trigger, these are the key terms you’ll need to understand to get the full benefit of doing your product research when looking at reviews or installation instructions:
Take-up
The ‘take-up’ refers to trigger slack. This means the sear doesn’t begin releasing the hammer immediately as you pull on the trigger. The take-up ends once the trigger meets the ‘wall.’
Creep
‘Creep,’ is related to when people are mentioning ‘take-up’ but specifically refers to the extent of trigger movement between the time the sear begins to swing out of place and when the hammer is fully released. Consistent creep is OK as long as there aren’t any inconsistencies in the trigger creep such as an increase in trigger tension at different points along the creep — which can also contribute to inconsistent weight of trigger pulls.
Wall
The ‘wall’ is the point at which pulling on the trigger begins to move the sear and release the hammer. You’ll know you’ve hit the wall when you feel tension in the trigger and resistance to the squeeze you’re putting on it.
Trigger Break
Once you squeeze further past the ‘wall,’ that’s when the trigger ‘breaks’ and is the point where the sear completely releases the hammer which then slams into the firing pin.
Stacking
‘Stacking’ refers to an inconsistent trigger creep. If this happen, you’ll have to exert more pressure on the trigger to get it moving again, resulting in an inconsistent and jerky trigger pull. Generally speaking, if you’re dealing with an AR-15 drop-in trigger, you should not experience this or have to troubleshoot it at all.
Pre-travel
‘Pre-travel’ is the measurement of the distance of the take-up, wall, and creep combined.
Over-travel
‘Over-travel’ is the measurement of the distance the trigger continues to move even after it breaks.
AR-15 Trigger components
There are five main components to any standard AR-15 trigger which include the trigger, hammer, sear, disconnector and the hook. Know these components to make your AR-15 installation process that much smoother:
Trigger - The trigger is the main part of the mechanism. It’s the small lever you squeeze to initiate the firing action.
Hammer - The hammer is a flat-faced piece of metal at the top of the whole assembly. It rotates up and down, and when the trigger is pulled it strikes the firing pin, igniting the primer and the chambered round.
Sear - The sear is a piece of steel along the top of the trigger that keeps the hammer cocked until the trigger is pulled. While at rest, the sear keeps the hammer for striking. When the trigger is pulled, the sear angles downward and releases the hammer to strike the firing pin.
Disconnector - The disconnector is a component that keeps the hammer cocked. Once a round is fired, the hammer flies back into place with such force that without the disconnector catching and holding it in place, the hammer would bounce away and de-cock before the trigger could be held back in place.
Hook - The hook is the part of the hammer where it latches onto the disconnector. This keeps the hammer from de-cocking until the trigger is released, at which point the sear moves back into place and the hook slides off the disconnector. The sear then holds the hammer in place.
Tools Needed to install AR-15 Triggers
Installing a new AR-15 trigger is super easy as long as you have the right tools beforehand. Consider getting a vise and a lower receiver vise block to make it easier to hold the lower in place. However, you’ll definitely need a ⅛” punch or a #4 roll pin punch along with a nylon/brass hammer. A standard gunsmithing tool kit would include most of those tools and set you up for less headache when working on your AR15 or other builds in the future.
AR-15 Trigger Assembly
Make sure you have all the components needed to install the trigger. These include the hammer and its spring; the trigger and its spring; along with the disconnector and its spring. An optional, but recommended, component to install is the KNS non-rotating pin set. It reduces the likelihood of losing a hammer or trigger component while it’s in use. But just make sure to buy a set that’s the right size for your firearm.
Now for the step-by-step installation process:
- First, place the lower into the lower receiver vise block and angle it to see down into the lower.
- Attach the proper springs to each component. Be sure to get the disconnector spring installed with the flared side down.
- Drop the trigger into the trigger cutout of the lower receiver vise block. Make sure the springs rest on the lower receiver vise interior and aren’t caught in the cutout.
- Insert the 1/8-inch punch through the trigger pinhole in the lower receiver vise, passing it through the disconnector as well.
- If you’re using a tool like the KNS non-rotating pin set, select the internally threaded trigger pin and insert it into the trigger, which will push out the 1/8-inch punch as the KNS trigger pin slides into its place.
- The trigger is now installed, and you can place the hammer springs across the top of the trigger pin and bend the hammer into place, securing it with either a 1/8-inch punch or a #4 roll pin punch.
- Just like the trigger pin, you should next push the punch out as you’re pushing the hammer pin in.
- Install the pin connector covers over the flared ends of the hammer pin and be sure to align the threaded holes over the trigger pin.
- Finger tighten the screws holding the whole trigger system together, before using wrenches to fully tighten.
- However, do not overtighten the screws as that would risk easily stripping the screws in the trigger group.
Troubleshooting AR-15 Trigger
A common issue that the AR-15 trigger may suffer from is the failure to reset. If the trigger isn’t functioning, you can perform a simple check to see if this is the problem:
First, ensure the AR-15 is empty and on SAFE, then pull the charging handle to cock the hammer. Next, place the safety selector on FIRE, then pull the trigger to the rear and hold. While still holding the trigger, pull the charging handle to the rear and then release it. Then slowly release the trigger until you hear a click or a popping noise (that’s the reset).
Finally, pull the trigger to the rear again until the hammer falls. You’ll know you’re having problems with failure to reset if you don’t hear any noise when you release the trigger, or the hammer doesn’t fall when you release the trigger the second time (there should be an obvious feeling and audible sound as well if the hammer does fall). If you’re experiencing a reset failure, there are some things you can do to solve the problem:
- Check the hammer and trigger springs to make sure they’re installed correctly. It’s easy for them to get installed upside down. Make sure the legs of both springs are resting flat on the floor of the lower receiver vise block when installing.
- Check the disconnector spring to make sure it’s correctly installed with the large end up against the trigger and the tapered end underneath the notch in the disconnector.
If the springs are correct, you could polish the disconnector and hook with some Brasso to make sure they’re completely smooth, so they don’t catch on to each other. Just don’t polish them too much and wear away the catch mechanisms entirely.
Check for burrs in the trigger and hammer pins by opening the lower receiver vise, pressing your thumb on the hammer to cock it and then squeezing the trigger. Slowly let the hammer up, then back down while feeling for any catch or tension.
If there is tension, you can consider deburring the components by repeating this process while there’s plenty of lubricant in the assembly. You can also try polishing the trigger pins.
If nothing else works, the problem could be that there is too much distance between the disconnector and the hammer. You can try polishing the front lower side of the disconnector to remove some material from that area, but the only solution at that point may be a replacement disconnector.
Types of AR-15 Triggers 
There are four types of A-15 Trigger: the single-stage trigger, the two-stage trigger, the binary trigger, and the drop-in trigger:
Single Stage AR15 Trigger
Single-stage trigger is the standard trigger for most service rifles and store-bought AR-15s. The simplest AR-15 trigger, it’s reliable, doesn’t often have much creep or take-up, and stacking is rarely a problem.
Two Stage AR15 Trigger
Two-stage triggers are designed to create a trigger wall during trigger squeeze. In order to circumvent the need for a heavier trigger pull, it has slack intentionally built in. Once the trigger wall is reached, a predictable and slightly heavier pull is needed to release the hammer.
AR15 Binary Trigger
Binary triggers essentially fire two shots for every squeeze of the trigger. The hammer is released not only after the initial trigger squeeze but also once the trigger is released back into place. This type of trigger isn’t legal in all states, so check local regulations before buying one.
AR15 Drop In Triggers
Drop-in triggers are the easiest to install since it’s a self-contained unit with all the necessary trigger components combined. A good quality drop-in trigger should have already been adjusted at the factory to ensure that slack, creep, and stacking isn’t a problem.
Get Your Next AR-15 Trigger from 80% Arms!
We recommend using quality parts in your trigger group for the best results, and with out AR-15 mil-spec lower parts kit, you’ll have everything you need to assemble your trigger group in one affordable bundle. However, if you prefer something with a little more panache, check out the...


 Back to List